Setup your private VPN in less than 5 minutes with Wireguard
Setup your private VPN in less than 5 minutes with Wireguard


In an era where online privacy is paramount, having a secure and reliable virtual private network (VPN) has become essential for safeguarding personal data and ensuring anonymity.
Whether it's protecting sensitive information from prying eyes, bypassing geo-restrictions, or simply browsing the web securely, a private VPN offers users peace of mind in an increasingly interconnected digital landscape.
Among the plethora of VPN solutions available, WireGuard stands out as a cutting-edge solution, offering unparalleled speed, security, and simplicity.
Why should you use your own VPN?
- Control and Ownership: You have total control over your VPN infrastructure when you host your own WireGuard server on a virtual private server, or VPS. With self-hosting, you have complete control over your VPN, including security protocols and server location, in contrast to third-party VPN services where you are dependent on their servers and policies.
- Enhanced Privacy: You may avoid giving your data to unaffiliated third parties by running your own WireGuard server. Your online activities will be more private and secure as a result of not being exposed to their logging rules or any data breaches. With Crunchbits, you get both privacy and flexibility. We accept standard payment methods, and for those who value complete discretion, cryptocurrency is an option.
- Flexibility and Customization: Self-hosted WireGuard servers provide unmatched customization possibilities. Whether you want to integrate your VPS with other apps and services, increase security, or optimize performance, you may customize the server setup to fit your unique requirements.
- Reduced Costs: Although membership costs are common for third-party VPN providers, self-hosting a WireGuard server on a VPS may end up being more economical over time. For individuals, it's an affordable solution because there are no regular membership costs and you just pay for the materials you utilize. In fact, at Crunchbits, our cheapest VPS Plan starts at just $1.65/month.
Configuring VPS and installing Wireguard
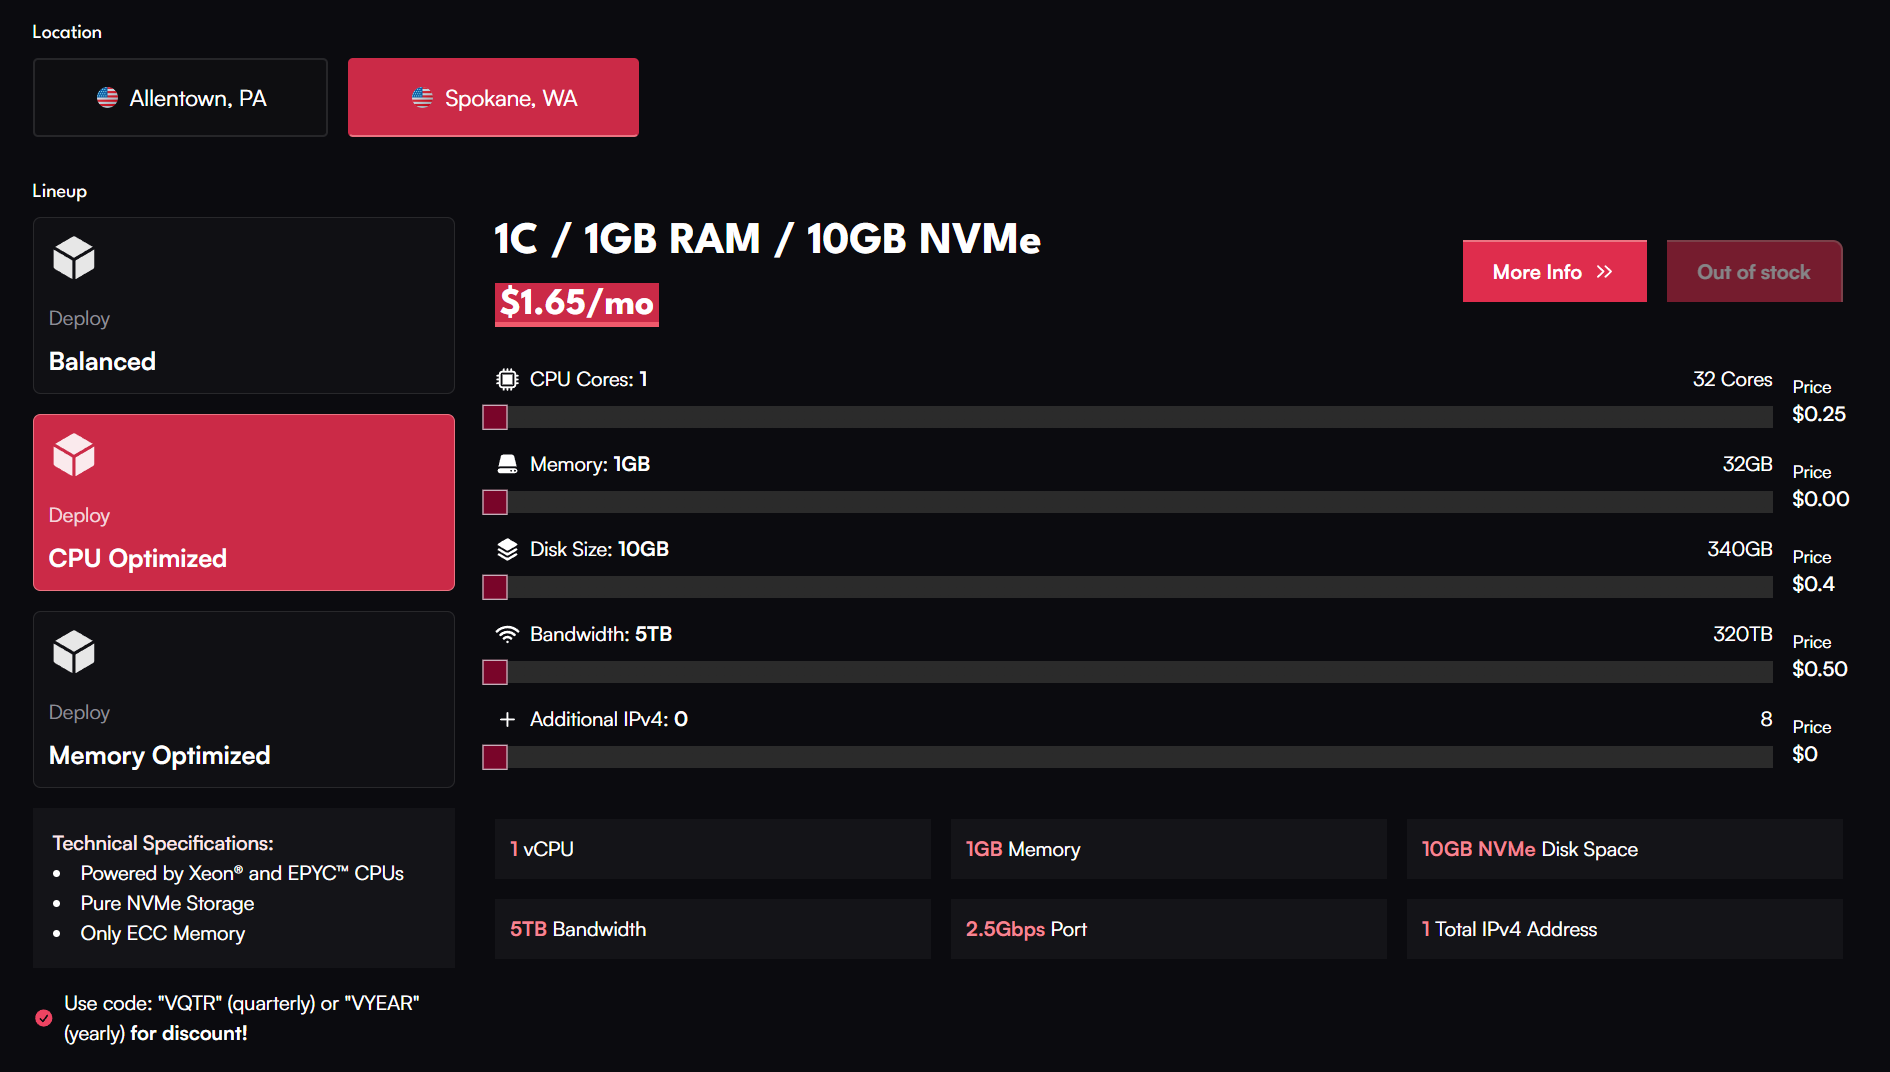
For this tutorial, I'll use our cheapest VPS plan - on Debian (instructions will work on Ubuntu as well), which starts at $1.65/month, which is plenty to run Wireguard. It has a generous bandwidth of 5TB and a port speed of 2.5Gbps. You also get a dedicated IPv4 address all for yourself, unlike public VPNs where IPs are shared. A routed /64 IPv6 Subnet is also included - that is 18,446,744,073,709,551,616 IPv6 addresses!
You can however use any VPS as you like for this tutorial.
There are many ways to install WireGuard on your system, we will be using Nyr's Road Warrior Wireguard Script - which is one of the easiest and fastest ways to get going and supports both IPv4 and IPv6.
SSH into your VPS and run the following commands
apt update -y && apt upgrade -y
wget https://git.io/wireguard -O wireguard-install.sh && bash wireguard-install.sh
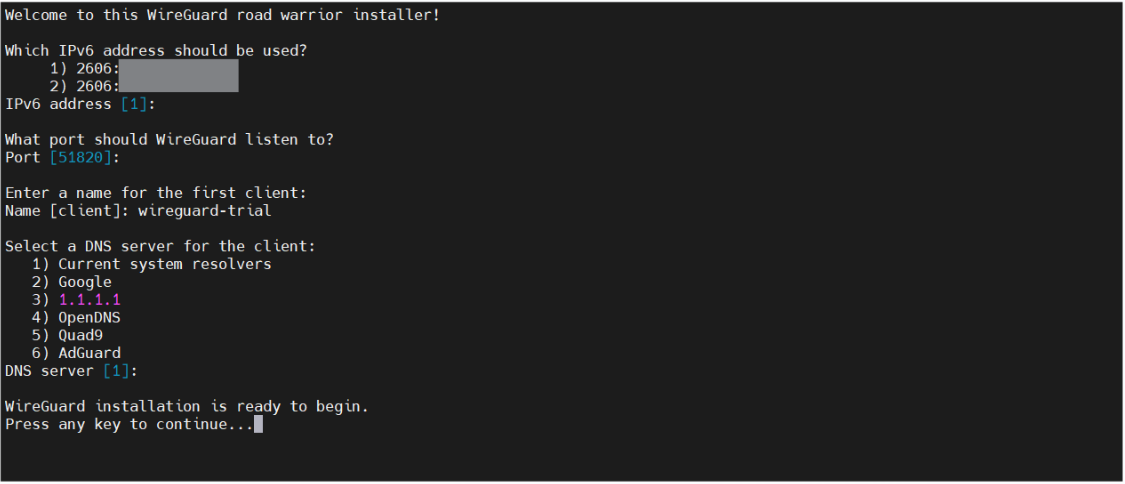
Follow the on-screen instructions, you can use the default values or change them as you like.
Once the installation is completed, you will be presented with a QR code.
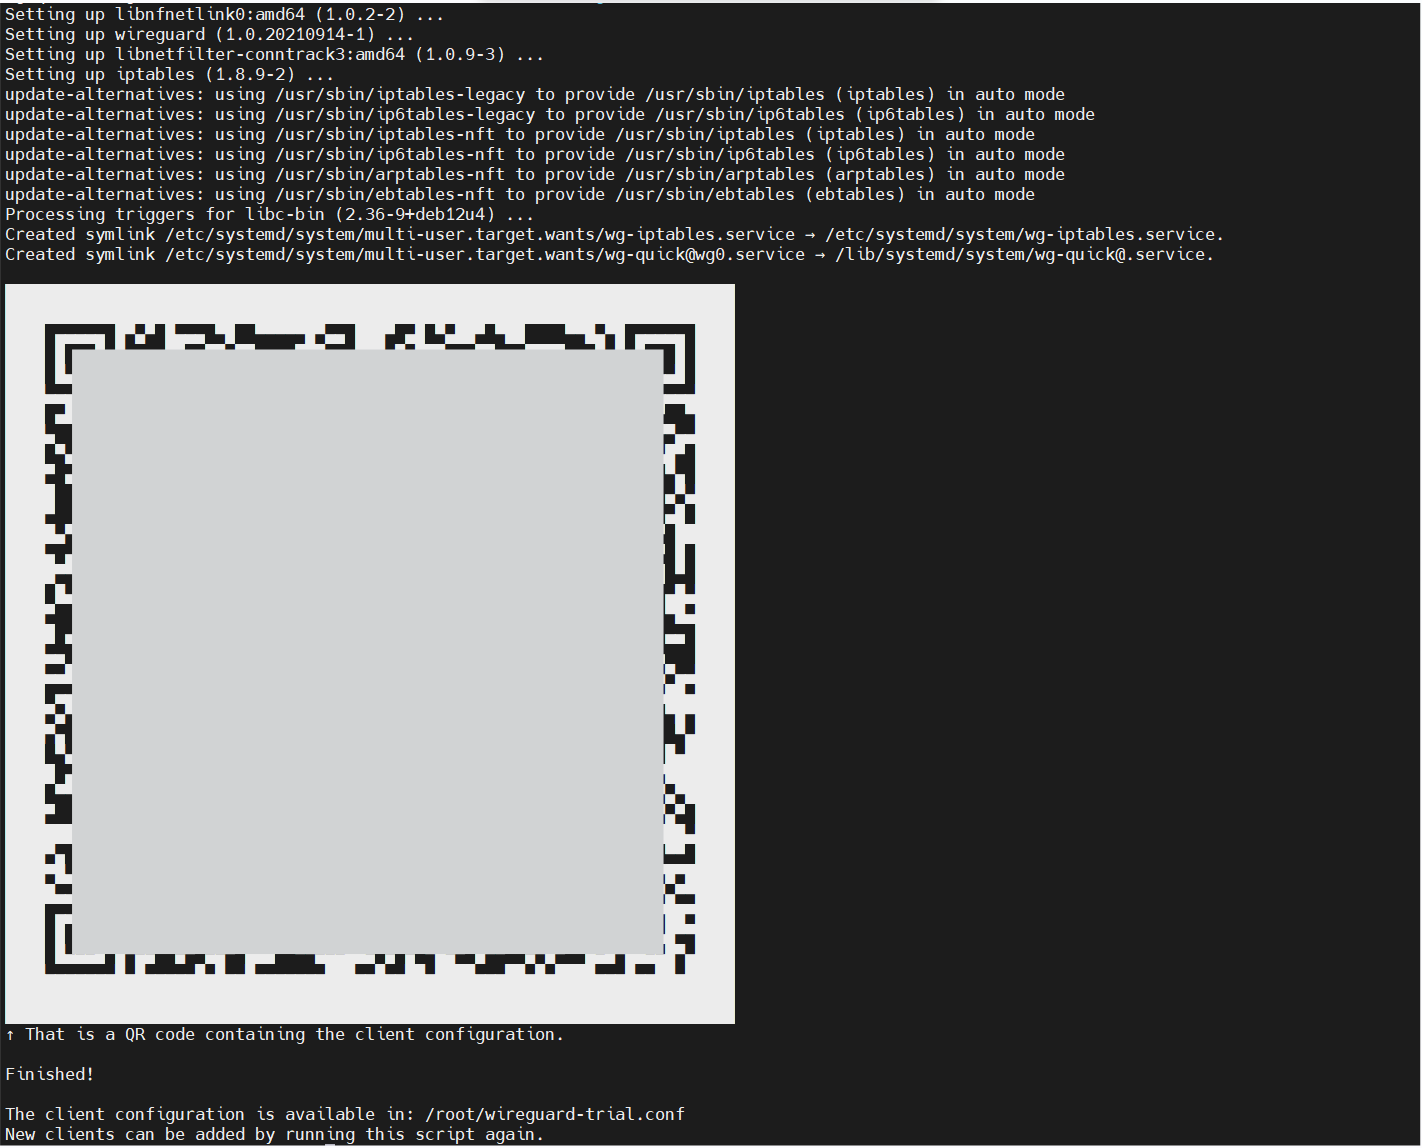
If you intend to run wireguard on your mobile, you can open the wireguard app and scan the QR code to get started. If not, a configuration file is saved in your root directory, in my case it's stored at /root/wireguard-trial.conf
You can either use the cat command to display the configuration or download it to your computer.
As I am using a Windows computer, I have already downloaded the Windows Wireguard Client App and added my newly generated config file.
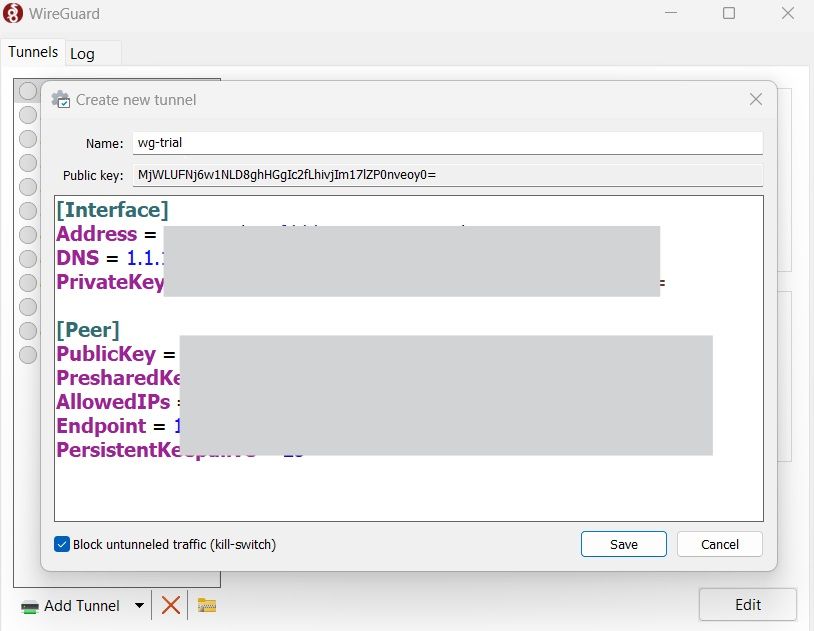
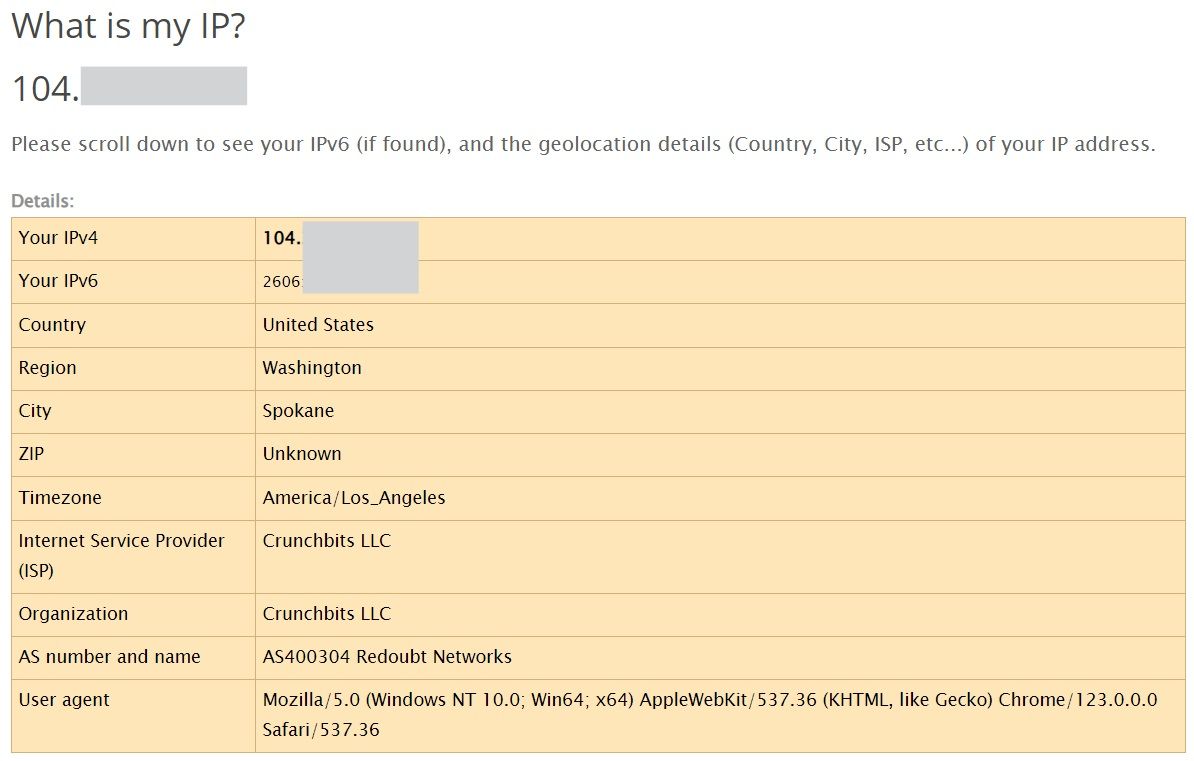
Once connected, my local traffic is routed to the VPN server - verified by checking my IP address.