
[TUTORIAL] How to install Nextcloud on Ubuntu 22.04

![[TUTORIAL] How to install Nextcloud on Ubuntu 22.04](/content/images/size/w2000/2023/02/Nextcloud.png)
Make sure to change the domain name crunchbits.net to your own domain!
This step-by-step guide is for a full manual installation on Ubuntu 22.04 (and will be similar for other Ubuntu/Debian installations) as root user. This is for a vanilla setup by downloading Nextcloud directly from the source. If you're wondering why you should use Nextcloud and take control of your data and privacy, read this first.
1. Adding DNS records:
Go to your registrar and add a DNS record with the following information:
Type: A
Name: nextcloud
Host: IPv4 address of server you're installing Nextcloud on
2. Updating the server:
Log into your Ubuntu server via SSH and run the following commands:
apt update
apt upgrade
3. Installing and setting up the database:
We use this command to install MariaDB database:
apt install mariadb-server
Then we secure the installation with:
mysql_secure_installation
This will give us some questions: Enter current password for root (enter for none):
Here you enter your root password
Switch to unix_socket authentication [Y/n]
Enter N
Change the root password? [Y/n]
Enter N
Remove anonymous users? [Y/n]
Enter Y
Disallow root login remotely? [Y/n]
Enter Y
Remove test database and access to it? [Y/n]
Enter Y
Reload privilege tables now? [Y/n]
Enter Y
If you get the following message then you have successfully secured your database.
All done! If you've completed all of the above steps, your MariaDB installation should now be secure.
Next up we get into the DB to do some changes:
mariadb
And type these in one at a time:
CREATE DATABASE nextcloud;

SHOW DATABASES;This will create a new database, and then show you this output:
+--------------------+
| Database           |
+--------------------+
| information_schema |
| mysql              |
| nextcloud          |
| performance_schema |
| sys                |
+--------------------+
In this list you should see nextcloud, which means we have successfully created our database (DB) for Nextcloud.
After seeing that message, follow it up with this command:
GRANT ALL PRIVILEGES ON nextcloud.* TO 'nextcloud'@'localhost' IDENTIFIED BY 'mypassword';Note: change the 'mypassword' to a strong unique password and keep it saved, for example: '60$npvUQJf#k&wIl$7h46q8KDp'
Hit enter and it will create a user named nextcloud with full permissions to the database nextcloud, which has a password of mypassword (or whatever you changed it to). Again, we highly recommend changing this password to a more secure one.
Then we flush the database to save all of the changes.
FLUSH PRIVILEGES;After you've typed in all of those commands use Ctrl+D to exit.
4. Installing packages and extensions:
We start with this command which will install the required software and extensions via apt.
apt install apache2 unzip php php-apcu php-bcmath php-cli php-common php-curl php-gd php-gmp php-imagick php-intl php-mbstring php-mysql php-zip php-xmlNext, we enable the extensions required for PHP.
phpenmod bcmath gmp imagick intl
5. Installing Nextcloud files:
First, change directory to /var/www directory which will contain your website files:
cd /var/www
Now we download the latest release of Nextcloud with this command:
wget https://download.nextcloud.com/server/releases/latest.zip
Unzip the downloaded Nextcloud archive with:
unzip latest.zip
Next, create a directory where all of the files will be neatly contained:
mkdir nextcloud.crunchbits.net
Afterwards, we move the files from this archive to our websites directory:
mv nextcloud/* nextcloud.crunchbits.net
Finally, we remove the unneeded files to clean up as we go:
rm latest.zip
rm -rf nextcloud
7. Configuring apache:
Change the ownership of the folder nextcloud.crunchbits.net to apache which is your webserver with the following:
chown -R www-data:www-data nextcloud.crunchbits.net
Now we have to disable the default website that comes with a fresh apache install. You will see this default site now when you go to your servers IP address:
a2dissite 000-default.conf
Create a new configuration file for our website (change the file name to match your directory/site name):
nano /etc/apache2/sites-available/nextcloud.crunchbits.net.conf
Then paste in this configuration:
<VirtualHost *:80>
DocumentRoot "/var/www/nextcloud.crunchbits.net"
ServerName nextcloud.crunchbits.net
<Directory "/var/www/nextcloud.crunchbits.net/">
Options MultiViews FollowSymlinks
AllowOverride All
Order allow,deny
Allow from all
</Directory>
TransferLog /var/log/apache2/nextcloud.crunchbits.net_access.log
ErrorLog /var/log/apache2/nextcloud.crunchbits.net_error.log
</VirtualHost>
After pasting it into the configuration file hit Ctrl+X then Y then enter
Keep in mind you will want to change "nextcloud.crunchbits.net" everywhere inside that paste to whatever your domain/folder combination is, for example: /var/www/nextcloud.crunchbits.net would become /var/www/nextcloud.mysite.com and should be changed everywhere you see that string inside that configuration.
Let's enable our website:a2ensite nextcloud.crunchbits.net.conf
To save all of the changes made we reload apache with this command:
systemctl reload apache2
8. Configure PHP:
Use this command to start editing the configuration file:
nano /etc/php/8.1/apache2/php.ini
Use Ctrl W to search these parameters and change them to their respective value:
memory_limit = 512M
upload_max_filesize = 200M
max_execution_time = 360
post_max_size = 200M
date.timezone = America/Detroit
opcache.enable=1
opcache.interned_strings_buffer=8
opcache.max_accelerated_files=10000
opcache.memory_consumption=128
opcache.save_comments=1
opcache.revalidate_freq=1
output_buffering = 0
After you are done editing hit Ctrl+X then Y then enter
10. Enable apache mods
We need to enable some apache mods with this command:
a2enmod dir env headers mime rewrite ssl
Then we restart apache again:
systemctl restart apache2
11. Adding SSL
Updating snap package installer:
snap install core
snap refresh core
Install certbot:
snap install --classic certbot
Mount certbot to the proper path:
ln -s /snap/bin/certbot /usr/bin/certbot
Then we create SSL for our website:
certbot --apache
Afterward, it will ask you some questions:
Enter email address (used for urgent renewal and security notices)Enter your e-mail address.
- - - - - - - - - - - - - - - - - - - - - - - - - - - - - - - - - - - - - - - -
Please read the Terms of Service at
https://letsencrypt.org/documents/LE-SA-v1.3-September-21-2022.pdf. You must
agree in order to register with the ACME server. Do you agree?
- - - - - - - - - - - - - - - - - - - - - - - - - - - - - - - - - - - - - - - -
Enter Y
- - - - - - - - - - - - - - - - - - - - - - - - - - - - - - - - - - - - - - - -
Would you be willing, once your first certificate is successfully issued, toshare your email address with the Electronic Frontier Foundation, a foundingpartner of the Let's Encrypt project and the non-profit organization thatdevelops Certbot? We'd like to send you email about our work encrypting the web,EFF news, campaigns, and ways to support digital freedom.
- - - - - - - - - - - - - - - - - - - - - - - - - - - - - - - - - - - - - - - -
Enter N
Which names would you like to activate HTTPS for?We recommend selecting either all domains, or all domains in a VirtualHost/server block.
- - - - - - - - - - - - - - - - - - - - - - - - - - - - - - - - - - - - - - - -
1: nextcloud.crunchbits.net
- - - - - - - - - - - - - - - - - - - - - - - - - - - - - - - - - - - - - - - -
Select the appropriate numbers separated by commas and/or spaces, or leave input
Enter 1
Deploying certificateSuccessfully deployed certificate for nextcloud.crunchbits.net to /etc/apache2/sites-available/nextcloud.crunchbits.net-le-ssl.confCongratulations! You have successfully enabled HTTPS on https://nextcloud.crunchbits.netWhen you get that message it means that your website is now secured with SSL.
12. Finishing the Installation
Go to your new Nextcloud installation (i.e.: https://nextcloud.crunchbites.net) and let's setup your new cloud:
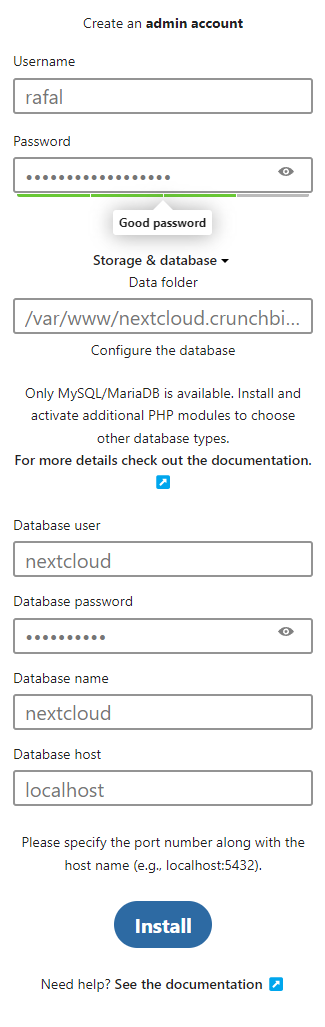
Username: Your chosen username
Password: Your chosen password
Data folder: Leave as is or change it to some other place where you want things stored, for example a mounted HDD
Database User: nextcloud
Database Password: Whatever you chose in step 3
Database Name: nextcloud
Database Host: localhost
Then click Install
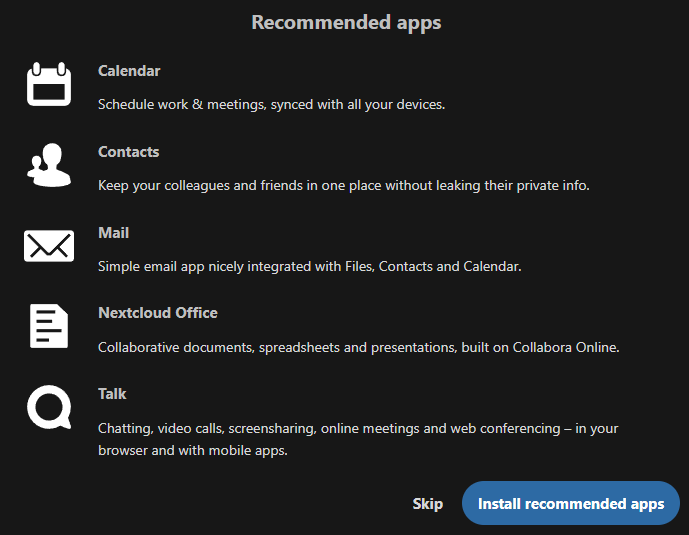
When you get to this screen click Install recommended apps
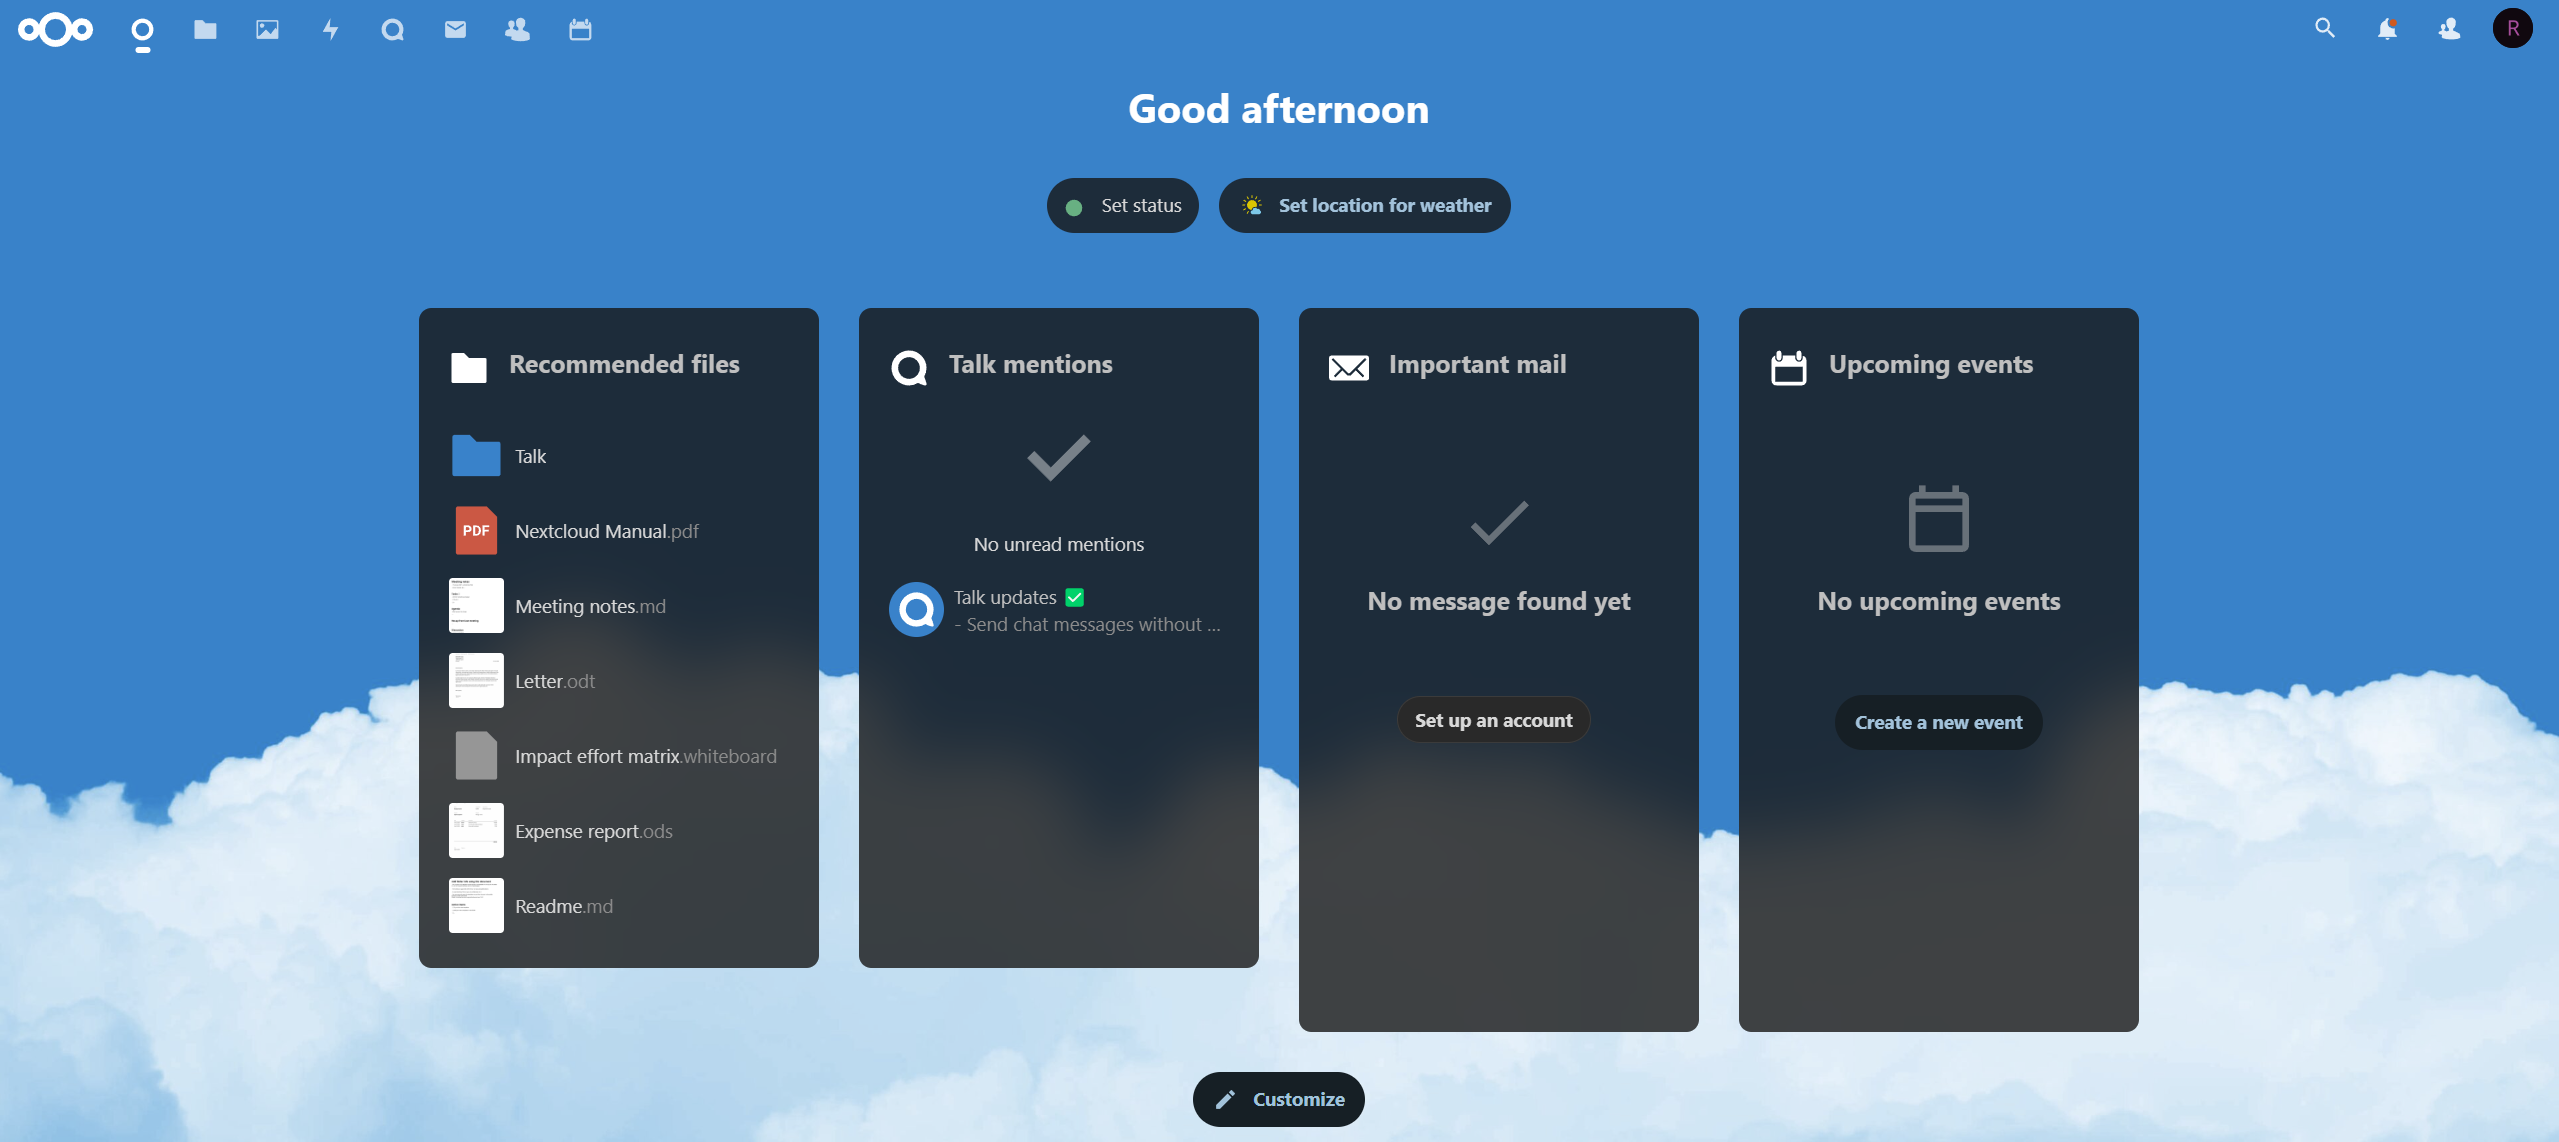
Now we have successfully installed Nextcloud and it is ready to be used!
Taking a step to protect your data privacy and truly own your data is always a good feeling. While this is a little more hassle than just paying Microsoft Azure or other large cloud providers, you can rest easy knowing that you won't have everything scanned by an intrusive cloud provider or leaked to some hackers that breached 50M+ other customers with you.